Finally moving your Enterprise Public Folders to the cloud? Understand protocols and options (spoiler alert! some are no more than wishful thinking)

If your first thought when you read this blog title, was “but do people still use Public Folders?”, the answer is YES!

Not only corporations still use Public Folders, but also they want to move them to the cloud and keep using them.

For the past year or two, working for a company that owns an outstanding migration product, MigrationWiz, I’ve seen a trend of large organizations worldwide getting to their final stages of the transition to the cloud. Usually, what that means in practical terms, is that they are addressing the more complex and harder to move or coexist workloads, which also translates to Public Folder migrations, amongst other things.

For many years Microsoft made it easy for Microsoft 365 users to access Public Folders on premises, and not that long ago they enabled on premises users to access Microsoft 365 Public Folders.

What Microsoft never supported, although it was technically possible, was two source of authorities for a Public Folder infrastructure, within a Hybrid Deployment. But all this flexibility pushed Public Folder migrations to the back of the “moving to the cloud” workload queue.

So now that we have a little bit of context on Public Folder migrations, lets address the options, when you decide to finally make the move.

How much data do you have to move?

From my experience, there are fundamental differences between two main types of migrations, you might be faced with. My first exercise, when trying to help a customer or a partner, plan their Public folder migration, is to determine if it’s a small or a large migration. Let me share with you where do a draw the line between both:

  • Small migrations: Migrations of up to 50GB of data, 1000 folders and 100k items
  • Large migrations: Anything above that

The main differences between a large and a small migration

Depending on the volume of data, or migration project can be simplified, or very complex. Here’s some bullet points on why:

  • Small migrations can easily be done with lift and shift protocols, like OA (Outlook Anywhere) or MRS (Mailbox Replication Service), however if you are looking at data transformation – this topic justifies a dedicated blog post, so won’t get into much detail on it here, but you can characterize migrating from Public Folders to Shared Mailboxes as an example of data transformation – and/or filtering or mapping the data differently from the source, you should use an EWS based migration product.
  • Small migrations do not require pre migration split work, to balance data between multiple destination mailboxes. In fact the lift and shit protocols do not require that.
  • Remember the wishful thinking mentioned on this blog title? Well trying to execute large migrations with lift and shift protocols, is exactly that. If you think you can migrate 2TB of Public folders with MRS, there’s no better way of saying this so I’ll just go for it: “YOU’RE WRONG”.
  • In addition to the above, large migrations also require pre migration work, that will basically focus on splitting the data into smaller chunks and pointing it to multiple target mailboxes, just so we never rely in the Microsoft auto splitting process for Public Folders.

Available protocols

Now that we outlined some of the biggest differences between large and small migrations, lets talk about the available protocols to migrate:

Outlook Anywhere

Outlook Anywhere is an old legacy protocol, that amongst other things, can be used to migrate Public Folders from Exchange 2010 to Exchange Online. But what are the main problems with Outlook Anywhere?

  • as stated above, the protocol is legacy and Microsoft actually stopped supporting it, in Exchange Online, back in 2017.
  • OA migrations are lift and shift and not feasible for large volumes of data
  • Setting up and/or troubleshooting OA can become complex really fast, in an Exchange version that is EOS since October 2020
  • Previous patching of the Exchange Server can be needed, before proceeding
  • Obviously it goes without saying but, OA does not support EXO (Exchange Online) as source

Mailbox Replication Service

MRS is a well established “migration-ish” protocol, that is very well know for it’s use in Hybrid migrations. For Exchange 2013+ that is the method used. Once again, where can things go wrong here?

  • With MRS, just like with OA, you’ll follow a lift and shift migration and face all the challenges that come with it, for large volumes of data
  • Being a lift and shift doesn’t only make it nearly impossible for some scenarios, it also makes it a non suitable option for mergers, acquisitions, hosted exchange and any scenario where you either have multi tenancy or you don’t want to target the entire Organization, in source or destination
  • The permissions the MRS requires can also be a road block, for the scenarios described in the bullet point above

Exchange Web Services

With Exchange Web Services the approach to migrate the data will be completely different. EWS will target each item in the source and create it in the destination (obviously this is done in batches of items). What that gives you is a whole bunch of options, such us:

  • When to migrate which data (folders, items) and to where (i.e PF to Shared mailboxes)
  • Split the source data to optimize speeds
  • Resume the migration from where it failed, when it does (believe me, at some point if your structure is huge, it will fail)
  • Migrate Terabytes of data
  • Scope source and destination permissions as needed
  • Target Public Folders in Hosted Exchange, per tenant
  • Migrate from Exchange Online

The bottom line

I hope that now that you read this, if you’re thinking about moving your decades old Public Folders into M365, at least you know the options you have.

There are pros to MRS (not so much to OA, to be honest), and if you have 5GB of PFs to migrate, an up to date Exchange with hybrid in place, then you can use it, but this blog post is focused in Enterprise customers, with hundreds of GBs or even TBs of data to move, and being very pragmatic, from my knowledge, that’s just not possible to do, with MRS.

Do let me know if you have any questions. Thank you for reading!

Office 365: Script to get detailed report of assigned licenses

BLOG UPDATE: April 1st 2021

Hi everyone. I wrote this blog post many years ago, and throughout the years this has been a blockbuster in terms of visits. Thank you for that.

I think that highlights the growing need companies have, to assess their Microsoft 365 portfolio. That of course comes from a gap in the native portal and the native reporting capabilities.

I decided to update this blog post and let you all know about the BitTitan Voleer IT Automation Toolbox. Those who know me, know that I work for BitTitan, but this is not a “sponsored” blog post. You can register for free and it literally takes you 5 seconds to fill in the below, which is all the information you need to give, to register and trial it for 30 days.

1-trialreg

Once you register you can login and either search in the library for “Microsoft 365 License Usage And Optimization Assessment” or go directly to it, by clicking here.

You can then follow these simple steps to execute the assessment:

  1. Read the instructions and click on “Launch” on the right hand side, once you select the Workspace (Sandbox is the default)
  2. Authorize Microsoft Graph access to your tenant, by clicking the available links and entering the code provided. Click “Validate” when done.
  3. In “Configure” you can configure filters to assess just part of your Organization. The filters can be done by dropdowns, string or using User Principal Names. Common filters you can use include country, account log in state or Department, amongst others. Leave blank to assess the entire tenant.
  4. Also in “Configure” you can select to email the report from a Voleer email address, or from one that you would put username and password for. You then select to which address is the report being sent to and password protect it.
  5. Once all of the above is completed, click “Execute”

Once the execution is complete you will get an email, with an attached CSV with multiple tabs, with all the information you need. See below an example of the assessment Dashboard.

MicrosoftTeams-image (3)

You can save the template configuration, to make future executions easier and you can also schedule it. Those are 2 huge benefits that add to the fact that you have the awesome feature of filtering the assessment (i.e assess licensing for login disabled users only). Top that with not having to handle PowerShell scripting and I think you have enough reasons to go check Voleer out.

Voleer has many other templates in the library, that you can check out and run during your free trial.

Any questions let me know and, if you want to run it the “old way”, keep reading. I have the PowerShell “one liners” below that will help you create the reports of your licensed users.

BLOG UPDATE END

It’s very common to see Office 365 administrators asking in the community “How can I get a detailed report of the licenses i have assigned on Office 365?

Well it will depend on how detailed you want the report. I’ll detail here two solutions.

1 – Get a report of all licensed users and the AccountSKUId name

To run this report you need to open the Windows Azure Active Directory Module for Windows Powershell, and connect to Office 365. Once connected run the following cmdlet:

Get-MSOLUser -All | select userprincipalname,islicensed,{$_.Licenses.AccountSkuId}| Export-CSV c:\userlist.csv -NoTypeInformation

The above command lists ALL users and not just the ones that have a license. See the output CSV file below. There are ways of filtering the output (i.e export only licensed users), but i will keep this post simple. Let me know if you need something more elaborated.

1

2 – Get a detailed report of the licenses enabled for each user

One of the other requirements, is to know in detail, how many licenses per product do you have enabled, and which users have that license. If you want a detailed list with the users that have Lync Online, Exchange Online, Office Pro Plus (just to give three examples), or any other product that you have on your subscription, enabled or disabled, all you need to do is use the “Export a Licence reconciliation report from Office 365 using Powershell” script available on the Microsoft Gallery.

Again to run this report you need to open the Windows Azure Active Directory Module for Windows Powershell, and connect to Office 365.

Once connected to Office 365 browse into the directory where you saved the script, and run it.

2

The script will prompt you for the Office 365 administrator credentials, and run against all licensed users. By default the script creates a file named “Office_365_Licenses.csv” that will be created on the same directory where the script is. If you want, you can change it by editing the script. There’s also some other things you can change on the script, such as export all users and not just the licensed users, or use the existing credentials cached on your powershell session, instead of prompting you for credentials each time you run it. But again I will keep it simple for now, and if you want to change something on how the script works, let me know.

Now let’s have a look at the detailed output of the script.

3

Let’s now take the user Antonio Vargas as an example. He has all licenses assigned. Let’s see the view from the portal.

4

As you can see the Yammer licenses are assigned by default (hence the “PendingInput” state on the property exported to csv), and all other licenses are assigned, which matches with the success property on the csv. Now below let’s have a look at the user Calvin, which only has the Exchange Online license enabled (and the Yammer by default). All the other licenses are disabled.

5

Again when looking to the licenses that the user Calvin has assigned, via the Office 365 portal, it matches the csv file.

If you want, and because usually the output you will get is a very large csv file, you can use filtering at the csv level to get smaller lists depending on the license type you want the report on.

Any questions let me know, and happy reporting! 🙂

Learn how to connect to your BitTitan account using our PowerShell module

In this blog post, we will teach you all you need to know, about connecting the BitTitan PowerShell to your BitTitan account. That is obviously the first step you need to do, before running your BitTitan scripts and automation.

BitTitan Environments

When you install and open our BitTitan PowerShell module, it’s default actions would be to send requests to our BitTitan.com platform, but although many of our customers don’t know, we also have dedicated BitTitan SaaS platforms in Germany and China.

To be able to change the environment you’re connecting to, you’ll have to leverage two cmdlets:

  • Set-MW_Environment – this changes the MigrationWiz environment and will cover any *-MW* cmdlets, corresponding to the migrationwiz.bittitan* website.
  • Set-BT_Environment – this changes the BitTitan environment and will cover any *-BT* cmdlets, corresponding to the manage.bittitan.* website.

You might need to use one or both of the cmdlets above, depending on the tasks you want to accomplish.

Common “*-MW*” tasks will include starting MigrationWiz migrations with the Add-MW_MailboxMigration cmdlet, or creating a MigrationWiz project with the Add-MW_MailboxConnector cmdlet, among many others.

Common “*-BT*” tasks will include listing your customers with the Get-BT_Customer cmdlet, or scheduling a DeploymentPro user with the Start-BT_DpUser cmdlet, among many others.

Although in out BitTitan cmdlet refererence page you will see many environments that can be set, the relevant externally available are the ones listed below, that apply for both BT and MW cmdlets:

Value Description
BT Represents BT
China Represents China
Germany Represents Germany

Based on the above, to change your PowerShell environment to Germany, after you open our PowerShell module, you would run the following:

Set-BT_Environment -Environment Germany
Set-MW_Environment -Environment Germany

Note that you can and should include those lines in your scripting, if it’s to run it consistently in those environments. Also, you can’t run commands in two different environments for MW or BT, in the same session. You would have to switch environments and to switch back to our .com platform, use the value BT.

The concept of ticket and how to create it

Once you ramp up your skills in our SDK, you’ll quickly learn that you can’t do anything with it without a ticket.

So what is a ticket?

A ticket in the BitTitan PowerShell module is an authentication token with several parameters, that you use each time you execute an action. The main parameters of the ticket are:

  • WorkgroupID – You can create a ticket specifically to a BitTitan Workgroup
  • IncludeSharedProjects – When set to true this is the parameter that allows you to see all projects and not just the ones you created. This parameter is exclusive for MW tickets
  • ExpirationDate – When the ticket expires. Tickets are by default valid for 1 week

How do I create a ticket?

You need to create 1 ticket specific for MW actions and 1 for BT actions, using the following cmdlets:

$MWTicket = Get-MW_Ticket -Credentials (Get-Credential)
$BTTicket = Get-BT_Ticket -Credentials (Get-Credential)

You can then leverage those tickets each time you run a cmdlet, for example:

Get-MW_Mailbox -Ticket $MWTicket

or

Get-BT_Workgroup -Ticket $BTTicket

Create a MigrationWiz ticket with project sharing

MigrationWiz enables collaboration. What that means is that either via the UI or PowerShell you can access and manage all objects within a workgroup, regardless if you created them or not.

Project sharing can be enabled or disabled. In the UI you have a checkbox for that, but with PowerShell what determines if you’re using project sharing is the way you create your ticket. We highly recommend that you use project sharing at all times, so now that you understand what a ticket is and how to create it, lets look at how to do it with the sharing enabled.

To create a ticket with project sharing you need to add 2 parameters to the cmdlet:

  • IncludeSharedProjects
  • WorkgroupId

And here’s the completed command:

$MWTicket = Get-MW_Ticket -Credentials (Get-Credential) -WorkgroupId [yourworkgroupid] -IncludeSharedProjects

You can obtain your workgroup id either by running the Get-BT-Workgroup cmdlet or by copying it from the URL in your browser, when you’re inside the workgroup.

BT tickets do not need project sharing, it only applies to MW tickets.

The bottom line

Hopefully the information above will help you understand in more detail how to connect and authenticate to the BitTitan systems, via the SDK, and all the options you have to incorporate in your scripts.

Ramp up your skills and start using the BitTitan Powershell

The purpose of this article is to provide you with the information you need to code with the BitTitan PowerShell module. We’re not going to teach you how to write a PowerShell script, code error handling, or build a loop. There are good resources online to help you develop those skills. If you’re familiar with PowerShell, you know there’s a learning curve for each new module. For example, you’ll want to learn how to connect and how to execute tasks such as creating or modifying objects. We want to help you get ahead of the curve so you can successfully build BitTitan SDK automation.

Here are resources that will help you ramp up your BitTitan PowerShell skills.

Cmdlet reference page

Once you’ve installed and started using the PowerShell module, you’ll want to check out our cmdlet reference page. This is where you’ll find all available cmdlets for the module, as well as some valuable examples of each parameter.

To give you an idea, if you need help defining items to be migrated with the Add-MW_MailboxMigration, click on the cmdlet in the left menu. Then, scroll down to ItemTypes where you’ll see a table of all available types.

GitHub script repository

In our GitHub repository you’ll find a variety of scripts, from simple scripts for basic tasks to elaborate scripts that execute complex migration workflows. Check it out here.

PowerShell blogs

We blog about our PowerShell module and scripting on GitHub. Check in often at  www.bittitan.com/blog/tips-and-tricks/ to see use cases for scripts or learn some coding with our SDK.

(this blog is a repost of the original blog that I wrote and published here)

How to share the same email domain between two Exchange Online tenants for long term mail flow tenant to tenant coexistence [Part 1]

Note: Let me start with a quick note. This blog post was initially drafted to include multiple mail flow coexistence scenarios, between two Office 365 tenants. While I was writing the first scenario, I realized that it was so extensive that it didn’t make sense to put more scenarios in the same post. So stay tuned for more posts, each with its different scenario and some more focused on tenant to tenant enterprise migrations and mail flow during a coexistence period. Enjoy!

Some context

Microsoft tenant to tenant email migrations are very common in our days, and if some are small in terms of users, and the option is to just move them all at the same time, some are too big to have that approach.

Would you consider moving 50 thousand user mailboxes, in one single cut over batch, from one Exchange Online tenant to another? Probably not.

And there’s several reasons not to consider it, most, if not all of them having the user experience in mind. It’s not just about how many terabytes you can move per day, it’s also about re configuring Outlook profiles, re doing the Exchange partnership connection in your phone, all other Office 365 workloads, etc.

So when a cut over is not being considered, the coexistence between tenants comes into play. The biggest question is, can I leverage the same email domain in two tenants? And technically the answer is yes you can, but you’ll need an address rewriting service help you do it.

In a context of a migration, address rewriting is not all you need to have mail flow coexistence, but it’s the key component.

There are other components for you to consider, when doing tenant to tenant with coexistence, but this blog posts series will be focused on mail flow.

What do you need and why should you do it versus hosting it?

Lets address the requirements first. Assuming of course you have 2 tenants, the source and destination or in some cases just two tenants from which you want to send and receive email from, using a single SMTP domain, what you need next is something to do address rewriting (outbound email) and conditional forwarding or address rewriting (inbound email).

I will use the Microsoft Exchange Edge server. It’s a reliable service, that can be designed and implemented as high available and redundant, and it has a very easy to configure bidirectional address rewriting agent.

Note: before reading the rest of this blog post, I highly recommend that you click on the link above and read all details about how the Exchange Address Rewriting works.

Now lets address why should you do it yourself vs hosting it. In fact I think the decision is up to you, but there’s two things you should strongly consider:

  1. Do you want to pay a per user fee to host a service to either a migration software company or an email relay company, when you can do it yourself at much less cost?
  2. More importantly, will you allow a third party company into a crucial part of your email flow pipeline?

Those two questions are relevant, specially the second one. It involves SLAs and other super important things to consider, specially in the Enterprise space.

But if the answer to both questions above is yes, then you’re covered. If not, continue reading.

What will this blog post cover

This blog post will address a first scenario detailing mail flow simple coexistence with two tenants using one single email domain. I am labeling it as scenario 1, because this is the first blog post of a series that will cover other scenarios.

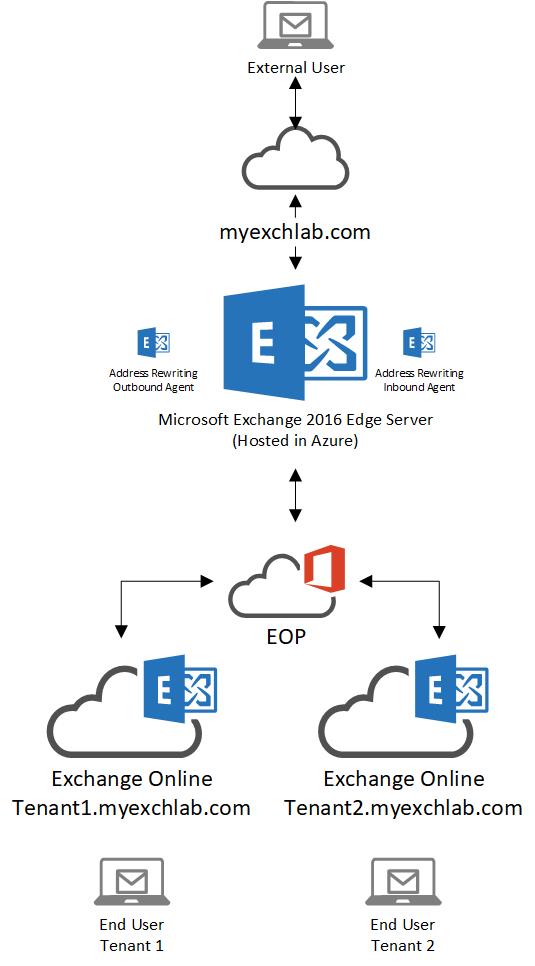
Scenario 1: Share a same email domain between two Exchange Online tenants

Scenario1-V1.0

What are the requirements?

To set the scenario above you need the following:

  • Two Exchange Online tenants (of course!)
  • One unique vanity domain per Office 365 tenant, which in my cases is:
    • Tenant1.myexchlab.com
    • Tenant2.myexchlab.com
  • One vanity domain to be shared by the two tenants, which in my case is myexchlab.com
  • At least one Microsoft Exchange Edge Server
  • An SSL certificate to encrypt mail flow between both Exchange Online tenants and the Microsoft Exchange Edge

Some important notes about the requirements:

  • my tenant vanity domains are sub domains of the shared vanity domain, but that is not a requirement. You can use different domains (i.e abc.com and xyz.com) in your configuration.
  • In this scenario all outbound and inbound mail flow goes via the Edge server. It is highly recommended that, for production purposes, you set up a high available and redundant multiple Edge server infrastructure.
  • My Edge Server is hosted in Azure, because it’s convenient for me to quickly set it up. You can host yours anywhere you want.
  • The SSL certificate and using TLS between the Exchange Online tenants and the Edge Server, is optional but recommended.

Outbound email from Office 365

In this scenario both tenants send all email via the Edge server. Optionally you can configure Conditional Mail Routing in Exchange Online, if you want just a group of users to route their email via the Edge. I am not going to detail that here, but please reach out if you need to elaborate more on that option.

Create the send connector in Exchange Online

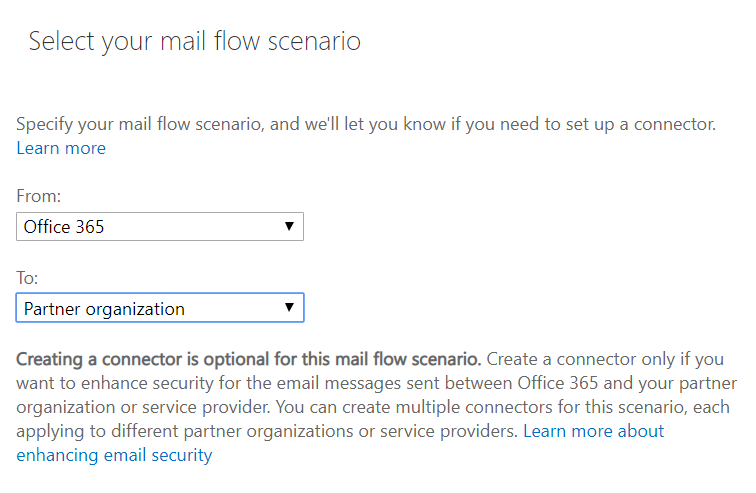
First lets check how the connector in Office 365 is created. If you need any basic help on how to set up Exchange Online connectors, read this.

  • In the select mail flow scenario, select the source as “Office 365” and the destination as “Partner Organization”

Connector01

  • Name the connector and turn it on

Connector02

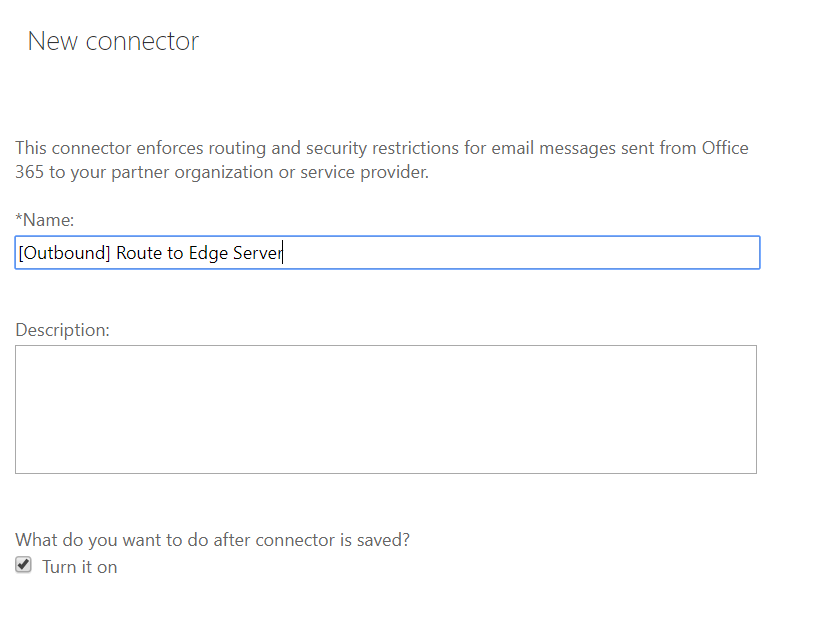
  • Select the destination email domains. I have selected * which means this connector applies to all external email domains

Connector03

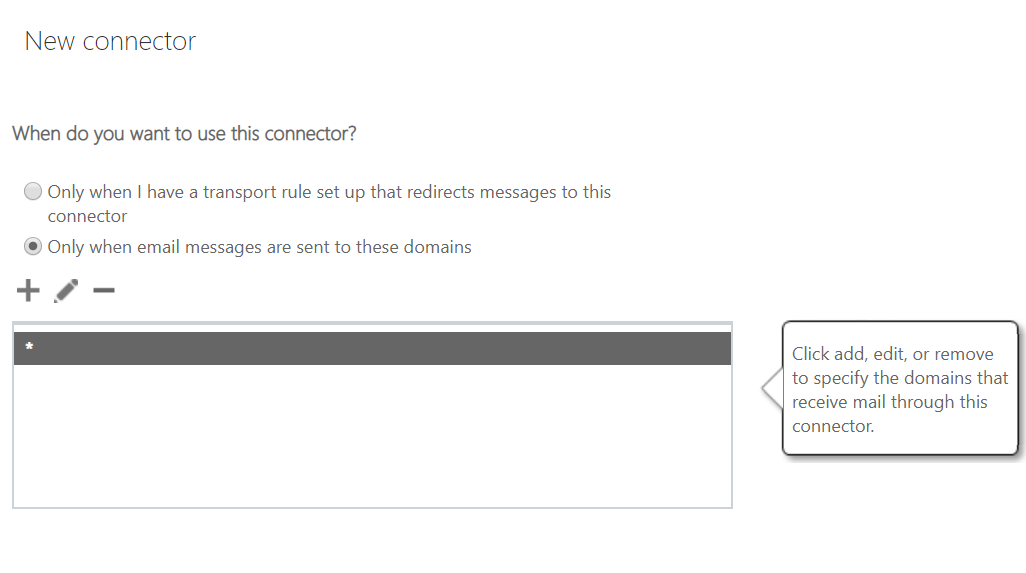
Note: Again here you can be more creative and configure a scenario where address rewriting (and more specifically here outbound email flow going via the Edge) only applies to specific destination domains – i.e you can rewrite addresses for your users but only when they email a specific partner company with a specific vanity domain

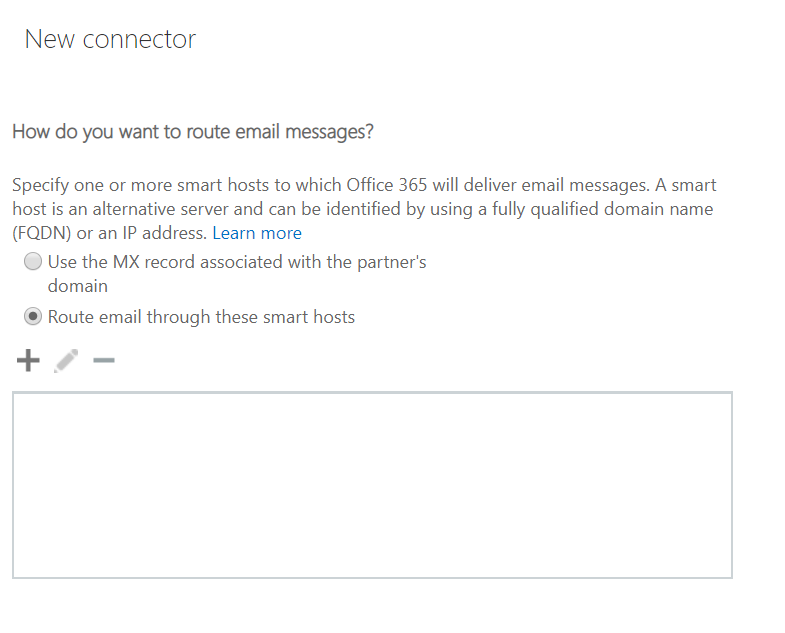
  • Enter the Public IP address of your Edge Server or load balancer in front of it.

Connector04

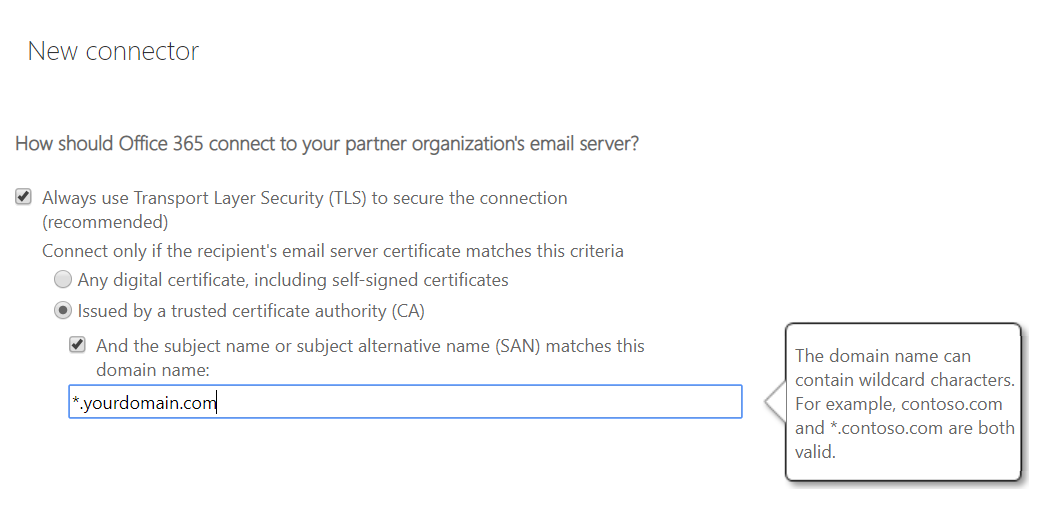
  • Configure the connector to always use TLS when communicating to the Edge Server. Enter the subject name or the SAN of the certificate you will use (more on how to configure the certificate later)

Connector05

And that’s it, your outbound connector is configured in your Exchange Online tenant. If you’re configuring this in a production environment, make sure you scope it for one test user first, until you’re 100% sure the Edge Server is configured properly and mail flow doesn’t have any issues.

Don’t forget to create the connector in both tenants.

Receive and Send connectors in the Edge Server(s)

Now that we addressed the Exchange Online connectors, lets look at the next hop in the mail flow pipeline, the Edge Server.

For this scenario to work properly, three things need to be created in the Edge Server:

  • Receive connector(s): This is key to accept email coming from EOP/Exchange Online
  • Address Rewrite Rule(s): To be applied by the inbound and outbound transport agents and rewrite addresses
  • Send connector(s): To send email outbound or inbound after the agent does its work

Lets address first the connectors.

Receive connector

There are multiple ways and scenarios to configure the receive connector, but ultimately here’s what you need to consider:

  • You should create a dedicated connector that accepts connections from EOP (Exchange Online Protection) only, by using the “remoteipranges” parameter when creating the connector
  • You should secure communications by adding TLS as an AuthMecanism and setting the “RequireTLS” flag to $true. You will also need to add the “TLSDomainCapabilities” and “TLSCertificateName” tags
  • If in your scenario, just like in mine, the Edge Servers are stand alone, you need to make the connector ‘ExternalAuthoritative’. This is key, because for address rewriting to be executed properly, the outbound emails should be considered internal email by the Edge Server. See more on how address rewriting works in this excellent article
  • Finally you need to make sure the connector accepts anonymous relay

Note: It is very important that you lock the connector down to a specific IP range and secure the communications with a certificate and TLS, since that connector will accept anonymous relay. Alternatively, if you have or can install an Edge Server in your existing Hybrid organization (and not stand alone like in this scenario), that will allow internal authenticated email, then you should opt for doing that.

Additional Note: I’ve added an additional method to protect your Edge and mail flow infrastructure from malicious relay from other Office 365 tenants. See the “Protect your Edge from malicious email relay by creating transport rules” section below.

Lets now start by creating the receive connector:

New-ReceiveConnector -Name “From EOP” -RemoteIPRanges [EOP remote Ranges] -Usage custom -AuthMechanism Tls -PermissionGroups AnonymousUsers, ExchangeUsers, ExchangeServers, Partners -Bindings 0.0.0.0:25

In the command above you should:

  • Change the name of the connector as per your naming convention
  • Add all EOP remote ranges that you can find here
  • Define specific bindings if relevant to your scenario

Once the connector is created, we need to add the necessary AD permissions:

Get-ReceiveConnector "From EOP" | Add-ADPermission -User 'NT AUTHORITY\Anonymous Logon' -ExtendedRights MS-Exch-SMTP-Accept-Any-Recipient

Before you add TLS to the connector, you need the certificate name:

$cert = Get-ExchangeCertificate -Thumbprint [Thumbprint of your third party Exchange certificate assigned to the SMTP service]
$tlscertificatename = "<i>$($cert.Issuer)<s>$($cert.Subject)"

Note: Make sure that you obtain, import and assign a proper third party certificate to your Exchange Server Edge, before you configure the receive connector

Now lets set all the necessary TLS properties in the connector:

Get-ReceiveConnector "From EOP" | Set-ReceiveConnector -AuthMechanism ExternalAuthoritative, Tls -RequireTls:$true -TlsDomainCapabilities mail.protection.outlook.com:AcceptOorgProtocol -TlsCertificateName $tlscertificatename -fqdn mail.yourdomain.com

Make sure that the FQDN of the connector matches the certificate name.

Receive01

Above a snapshot of the most relevant properties of the receive connector.

Send connector

Again here, for the send connector, you can have multiple scenarios. For mine, my Edge Server just has a simple send connector, not scoped to any transport rule or address space, that sends outbound email for all domains. Since this send connector is to send email to the Internet, no special TLS settings are configured.

The command I used was:

New-SendConnector -Internet -Name "To Internet" -AddressSpaces *

See here how to create a send connector and create your own.

Exchange Edge Address rewrite rules

Before I explain what rules you should create, I strongly encourage you to read this Address Rewriting on Microsoft Edge Servers article.

Address rewriting rules can be done per domain or per user. When you plan yours, think about if a domain type rule is enough or not, i.e do you want to translate John@abc.com to John@xyz.com, or do you want to translate John.Smith@abc.com to JSmith@xyz.com, meaning is the prefix changing or not? If the answer is yes the prefix will change, then you need one rule per user.

Lets now check what we need to do for this specific scenario:

  • John.Smith@tenant1.myexchlab.com is on the first tenant and we need to translate his address to John.Smith@myexchlab.com
  • Mary.Smith@tenant2.myexchlab.com is on the second tenant and we need to translate her address to Mary.Smith@myexchlab.com

Now the rules:

New-AddressRewriteEntry -Name "John tenant1.myexchlab.com to myexchlab.com" -InternalAddress John.Smith@tenant1.myexchlab.com -ExternalAddress John.Smith@myexchlab.com
New-AddressRewriteEntry -Name "Mary tenant2.myexchlab.com to myexchlab.com" -InternalAddress Mary.Smith@tenant2.myexchlab.com -ExternalAddress Mary.Smith@myexchlab.com

The rules I created in this scenario are bi-directional.

Again you should consider per domain rules when applicable. You can also import the rules via CSV, to make sure you can create all rules with minimum effort.

Protect your Edge from malicious email relay by creating transport rules

When you set up the connectors for inbound and outbound relay of email, although the connections require TLS and only accept emails from Exchange Online, you have no control on what other Exchange Online tenants will try to do, and if they try to use your Edge to relay email.

To be able to control that, you need to create multiple transport rules in all of your Edge servers. Creating a transport rule in an Edge server is not as linear and doesn’t have the same available options that a CAS server has, but here’s what you need to do:

First exclude the recipient domains by creating one transport rule for each (or consolidating all in one) that basically stops transport rule processing if it finds a match:

New-TransportRule -Name "Emails from Outside to myexchlab.com Inside" -FromScope NotInOrganization -AnyOfRecipientAddressContains "myexchlab.com" -StopRuleProcessing $true
New-TransportRule -Name "Emails from Outside to tenant1.myexchlab.com Inside" -FromScope NotInOrganization -AnyOfRecipientAddressContains "tenant1.myexchlab.com" -StopRuleProcessing $true
New-TransportRule -Name "Emails from Outside to tenant2.myexchlab.com Inside" -FromScope NotInOrganization -AnyOfRecipientAddressContains "tenant2.myexchlab.com" -StopRuleProcessing $true

And finally the rule with less priority that will drop the email if it’s from outside of the Organization:

New-TransportRule -Name "Drop email if Outside of Organization" -FromScope NotInOrganization -DeleteMessage $true

The rules above must be in the right priority, meaning priority 0 to 2 should be to the rules that stop processing more rules, if an internal domain is detected.

Then, if there’s no internal domain detected in any of the recipients of the message, the Edge should drop the message. This is to allow that inbound email still works and outbound doesn’t allow malicious connections for relay.

Basically what you are saying in the last rule is that if the sender is not internal to your organization, have the Edge server just drop the email, if that rule ends up being processed. I strongly advise you to test the rule right after you implement it, and make sure it allows all the domains you need.

Lets show the rule in action:

email14

As you can see above the email sent from a non accepted domain gets dropped by the Edge server. Also remember that the rules was processed because no other rule found a domain match in all recipients.

Consider the transport rules, although unfortunately very limited when applied in Edge Servers, when it comes to available actions and predicates, as an additional and important layer of security that you can apply to your infrastructure.

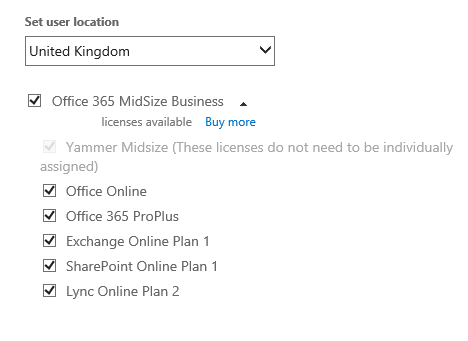
Accepted domains in the Edge Server

One of the important things I mentioned before, is that the Edge Server considers the outbound and inbound emails, sent to and from the domains you are translating to and from, as internal emails.

In my scenario all I had to begin with was a stand alone Edge Server, with no accepted domains, which might not be the case for you if you use an Edge in an existing Hybrid infrastructure, but if it is, here’s what you need to know about accepted domains:

  • Add the vanity domain from source and destination tenants, that you are translating from (outbound) and to (inbound)
  • Add the vanity domain both tenants are sharing

AcceptedDomains

Here’s the snapshot of mine, just so you understand better what I needed for my scenario.

DNS Records

Now let me describe how my email related DNS records should be configured. Remember this is specific for my scenario. Also I am only covering the MX and SPF DNS records. Make sure that you apply the industry recommendations for email when configuring your email domains (i.e DKIM).

The MX records

Here’s how the MX records for all 3 domains are configured, in my scenario:

  • tenant1.myexchlab.com: MX record points to EOP in the Office 365 tenant where the domain is valid
  • tenant2.myexchlab.com: MX record points to EOP in the Office 365 tenant where the domain is valid
  • myexchlab.com: MX points to the pool of Edge Servers

The explanation for the above is simple, you need to make sure that any email outside of the address rewriting can go to the correct recipient. For example, if someone external emails Peter@tenant1.myexchlab.com, there’s no reason for the email to go via the address rewriting process or the Edge pool. And this applies to any external communication going to source and destination going directly to those domains.

As for the myexchlab.com, the opposite happens, meaning if someone emails Jack@myexchlab.com, the email must go to the Edge just so the inbound transport agent can translate that address to Jack@tenantX.myexchlab.com. For that reason and because the Edge is the source of authority for the myexchlab.com domain, that effectively is not an SMTP address in any recipient in my scenario, the MX for that domain needs to point there.

The SPF records

Here I opted for the safest approach and configured all SPF records the same way, for all 3 domains, to include senders from:

  • MX record
  • Exchange Online protection
  • The Edge server

Lets break this down:

  • tenant1.myexchlab.com and tenant2.myexchlab.com: for this domains, hosted in Office 365, allowing the MX and EOP is redundant but it does no harm, and I allowed the Edge server for one simple reason, if the address translation fails for some reason, the email can still go from the Edge server outbound and the source address would be on of these domains, so for those unexpected scenarios you should add the Edge to the SPF.
  • myexchlab.com: for this domain, adding EOP is in fact not needed in my scenario, since there’s no point in time where the domain is expected to be moved to Office 365, but in most scenarios, specially migration scenarios, EOP should be in the allowed senders, so I added it. The Edge and the MX are again redundant, but you should have at least one of them.

Here’s how the SPF would look:

v=spf1 mx ip4:[Edge IPV4 Public address] include:spf.protection.outlook.com ~all

How everything works

It’s time to test the scenario now. Here’s what I will do:

  • Send an outbound email from both tenants
  • Reply to the outbound emails
  • Send an inbound email to both tenants

The results we will analyze are:

  • Verify source and destination “from” and “to” addresses, looking at the email in the destination
  • Verify that TLS is being used
  • See the transport agents in action

I don’t want to prove my scenario with screenshots, since I don’t think that’s relevant and I’d have to grey out most of the information anyway, but below you can find some snippets of how it worked, just so we’re clear on what you should expect and also how to troubleshoot any issues.

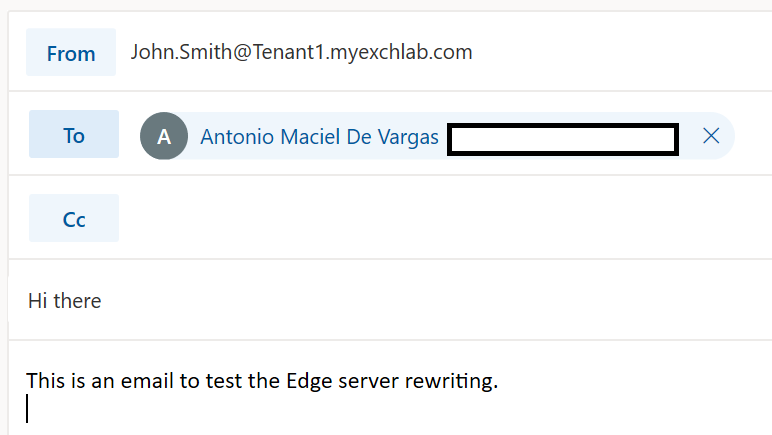
Outbound email from both tenants

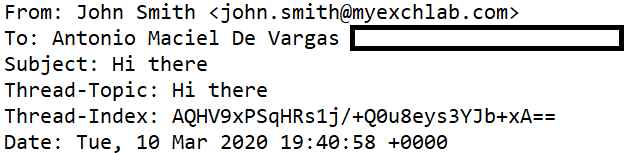
The email being sent at the source, from John:
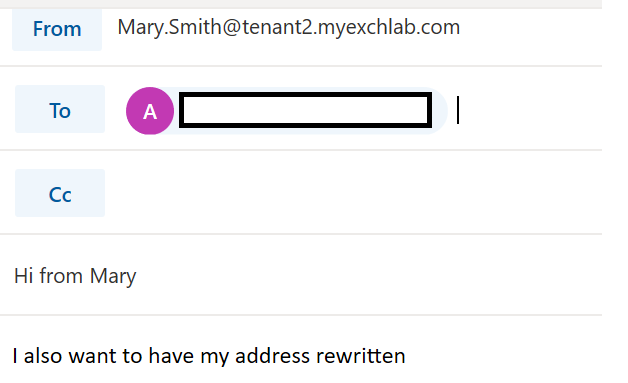
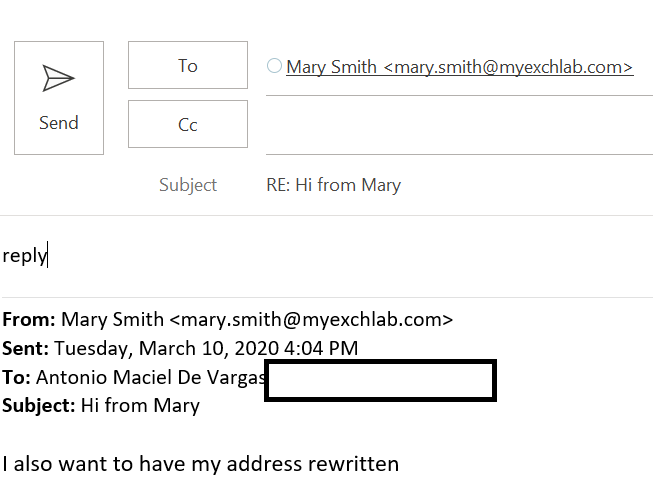
email01

And from Mary:

email02

Now lets see what happens when the email hits the Edge server:

email03

email04

I used the message tracking log, and as you can see for the message I sent, the agent event “SETROUTE” is translating the address.

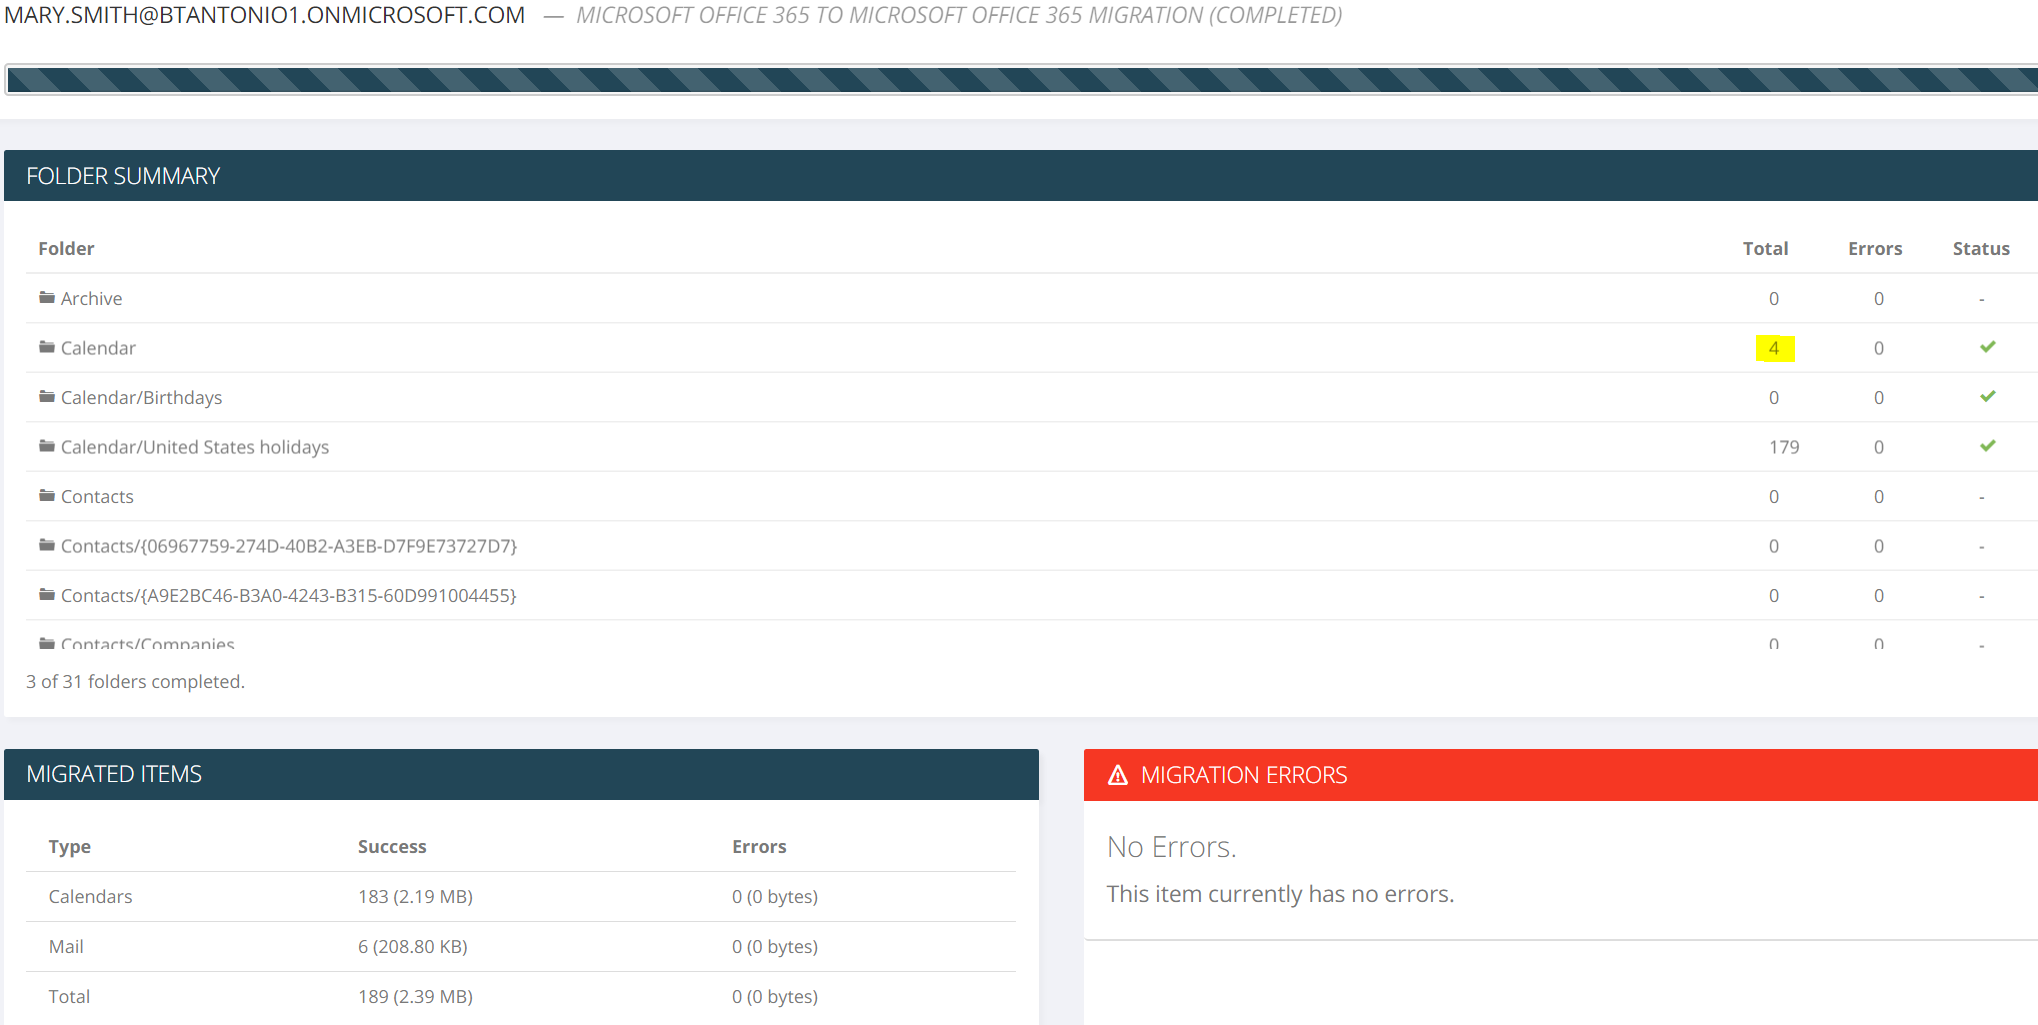
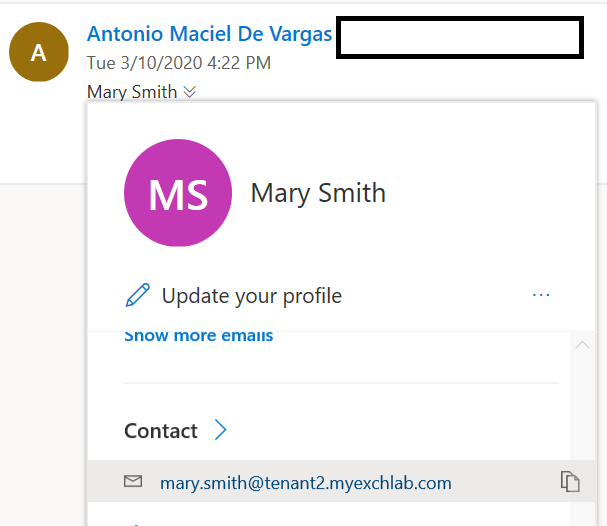
Lets look at the message in the destination:

email05

email06

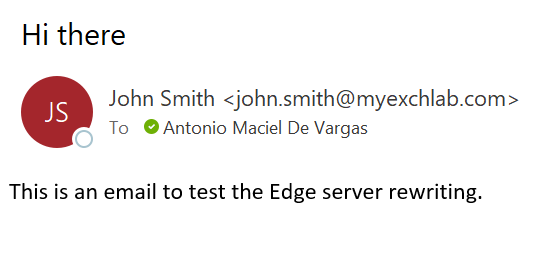
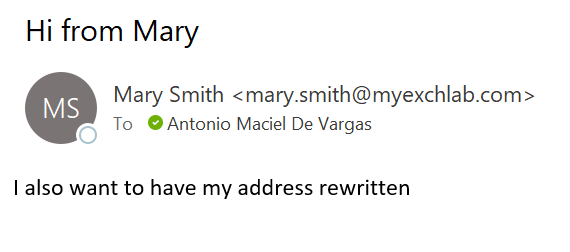
… and now lets really look inside the message 🙂 (just one of them now)

The original mailfrom address:

email07

The address translated:

email09

And TLS being used:

email08

Reply to the outbound emails

For the reply I will just use one user as the example, since the behavior is the same for both.

email10

So lets see what happens in the Edge:

email11

As you can see above, there’s two messages address to Mary, one is a reply and the other a brand new message, in both cases you can see that the recipient got translated. Unlike outbound email, you won’t see an event ID associated to the transport agent, but you can check in the recipients column that it did its job.

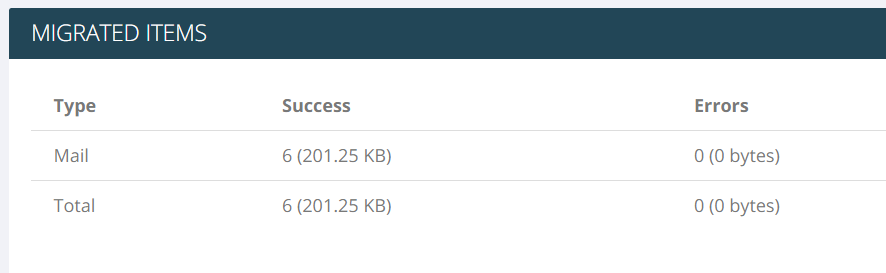
And finally, the external email in the internal mailbox:

email13

That’s it. Enough screenshots. Hopefully you understood how everything works and how you can troubleshoot it.

The bottom line

Hopefully after reading this blog post, you can understand better how the mail flow coexistence can be done. This was in fact a simple scenario but more will come in future posts. If you want me to describe and blog about a specific scenario you have, or if you need help understanding it better, please drop me a line.

I’ve been working in the migration business for more than 5 years now, and I’ve seen a lot of partners and customers that do need mail flow coexistence between two tenants. Because it’s not simple for Microsoft to address that, and allow things like the same vanity domain in two tenants, some companies created products and services that try and fill that gap, but like I said previously in this post, handing over your mail flow pipeline is not a simple decision nor one that Enterprises are willing to take, specially when it’s not that hard for you to do it yourself and I am sure that building and maintaining a high available mail flow infrastructure (like Edge servers) is cheaper than paying a per user fee to get this functionality.

In fact, for many Enterprises, they already have what they need. This doesn’t necessarily has to be done with Edge servers. The top email appliances in the market can do this as well. I might include some of those scenarios in future posts.

Stay tuned and thank you for reading!


How to access and test Microsoft Azure preview features

There’s always a lot of new services and products being offered through Azure, and some of them go into preview before being GA (General Availability).

There are two types of previews in Azure:

  • Private Preview. An Azure feature marked “private preview” is available to specific Azure customers for evaluation purposes. This is typically by invite only and issued directly by the product team responsible for the feature or service.
  • Public Preview. An Azure feature marked “public preview” is available to all Azure customers for evaluation purposes. These previews can be turned on through the preview features page as detailed below.

For the Public previews, that are available for anyone to test, there’s two easy ways of searching and accessing them:

Azure Updates webpage

If you browse to the Azure Updates portal, you can see all new features order per date and not only you can filter for the ones that are in preview, but you can also do a Keyword search.

BETA01

As you can see above, I did a search for ‘virtual machine’, for the in preview results. You can also filter results for product category or update type.

Create resource in Azure Portal

Another way to access features in public preview is to follow the steps below:

  • go to the Azure Portal
  • select ‘Create Resource’
  • on the search box type ‘preview’

beta02

On the search results you’ll be able to see all Marketplace services that are in preview, marked with ‘(Preview)’ after the service name. You can also filter per category on the left pane.

Azure Portal preview

Another interesting preview are you can check is the Azure Portal preview. if you go to https://preview.portal.azure.com/ you can login and experience navigation and other preview types for the portal.

beta03

The portal will be branded as shown above.

Bottom line

Always keep yourself updated with what’s coming for Azure, but more importantly, provide as much feedback as you can.

Exchange Auditing, Calendar Logging and @MigrationWiz mailbox migrations with @BitTitan

Before you read this post, please have a look at this Microsoft article about the Recoverable Items Folder in Exchange Online.

Two of the hidden folders you will find within the Recoverable Items, are there to log changes done to the mailbox:

  • Audits: If mailbox audit logging is enabled for a mailbox, this sub-folder contains the audit log entries. To learn more about mailbox audit logging, see Export mailbox audit logs in Exchange Online.
  • Calendar Logging: This sub-folder contains calendar changes that occur within a mailbox. This folder isn’t available to users.

Note: The folder “Versions” does keep track of multiple versions of a changed item, so in theory it also logs changes, but it’s not relevant for this post.

Dumpster01

Above you can see the structure of a mailbox and recoverable items.

So why is this important in the context of a migration?

When you leverage MigrationWiz to migrate mailboxes into a new Office 365 tenant, and because those tenants will have enabled by default both the Audit and the Calendar logging, the tool will create a lot of logs in those folders and in some extreme cases when the logs created are in a large number, it will slow down your migration.

It’s also important to state that the logs created on those folders are for the changes made by the migration tool. It logs what MigrationWiz changes in the process of the migration.

Dumpster02

The above is a warning thrown by MigrationWiz, stating that the folder “Audits”, in the recoverable deleted items, has more items than it should. Technically any folder in the recoverable deleted items can have up to 3 million items, but because MigrationWiz leverages EWS (Exchange Web Services), when the count goes over 100k items we will see and surface warning messages from Exchange.

Can you still create up to 3 million items? Yes, you should be able to, but the migration will slow down considerably.

Again, I want to stress that those items are probably in its majority the result of audit and calendar logging, and not necessarily items being migrated from the Audits source folder.

So how can we mitigate this?

Because the way to deal with Audit and Calendar logging is different, I am going to address it below, separately. Basically the solution, although applied separately and differently, is to disable Audit logging and/or disable Calendar logging, during the migration.

Before I proceed, and explain how you can do it, I have to state that both Audit and Calendar logging are security and compliance features in Exchange Online and on premises, so it’s ultimately up to you to decide if you should temporarily disable it or not. One thing that you should take into account, is if those mailboxes are being used by the end users or just for migration purposes? If it’s just migration purposes and if you are migrating mailboxes with very large item counts, then think of this as an option, since at that point there’s no end user actions to be logged.

Read more about Mailbox Audit logging in Exchange Server.

Microsoft doesn’t have a lot of official documentation on Calendar logging, but I’ll explain how you can disable it during the migration.

Mailbox Audit logs

There are several ways to disable Audit Logging in Exchange Online:

  • Disable Audit at the Organization Level
  • Disable Audit per mailbox

Read this article to understand how to Manage Mailbox auditing.

So let’s look at a mailbox without audit disabled:

AUdit1

As you can see above, the mailbox has audit enabled and is auditing all actions by admins, delegates and owner. We will not completely disable auditing in the mailbox, as it’s not needed. All we will do is disable Admin audit, since that is the only one that audits the impersonation access granted to MigrationWiz.

This is the recoverable items of the destination mailbox, before the migration:

Audit2

As you can see above, this being a brand new mailbox, the Audits folder is not even created.

And when migrating, we see the following:

Audit3

The count in the Audits folder went up to 6 items. Now lets see if that count matches what MigrationWiz migrated:

Audit4

Perfect match. So the bottom line here is that, as MigrationWiz copies the data into the destination mailbox, Exchange Online will Audit each action for each item as an Admin access to the destination mailbox. That can become a problem for mailboxes with hundreds of thousands of items, and a bigger problem when you are actually using MigrationWiz to move from recoverable items to recoverable items.

So now lets try the same migration but without Audit logging. Execute the following Exchange Management Shell cmdlet:

Set-Mailbox Peter.Smith -Auditadmin $null

Note: You might need to wait up to one hour (might take longer sometimes), after the changes are applied and before you migrate.

We will not completely disable auditing in the mailbox, as it’s not needed. All we will do is disable Admin audit, since that is the only one that audits the impersonation access granted to MigrationWiz.

Lets look at the results:

Audit9

I listed the entire mailbox just so you can see that the Inbox content was moved, but the Audits folder is still empty. Actually the Audits folder wasn’t even created because no audits were done and the mailbox is new.

Finally lets put the Auditing setting back to active. Don’t forget to re enable those settings, otherwise Admin auditing will stay disabled!

Execute the following Exchange Management Shell cmdlet:

Set-Mailbox Peter.Smith -DefaultAuditSet Delegate,Owner,Admin

To make sure the settings were applied you can run the command below:

Audit10

And that’s it regarding Audit logging. In summary, it’s up to you to run the migration with or without audit logging enabled for admin access, but in my opinion, temporarily disabling it during the migration might prevent some issues and be beneficial.

Calendar Logging

Exchange Online calendar logging will track changes of calendar items. Those changes will be stored in the recoverable deleted items, inside the “Calendar Logging” folder.

Just like with the Audits, when you are migrating data with MigrationWiz, in this specific case when you are migrating calendar items, the calendar logging folder can get a large volume of items, due to the logging feature being enabled.

The logic behind disabling it here is the exact same, and so are the reasons to consider it and decide if you want to do it or not.

Now lets look at how we disable calendar logging:

Audit5

As you can see above, there’s a property at the mailbox level named “CalendarVersionStoreDisabled“. By default that value is set to “False“. Lets see what happens when we migrate calendars with the option set like this:

Audit6

As you can see above the Calendar Logging is 7. Below you’ll see that the total number of calendar items migrated was 4. Depending on the meeting type (single, recurring, etc) the number of logged events in calendar might vary, and it’s not always 1 per event migrated.

Audit7

Again, above you can see in yellow the number of calendar events is 4. The default calendar (United States Holidays) migration does not get logged.

Now lets see how can we remove the logging. First start by running the command below:

Set-Mailbox Peter.Smith -CalendarVersionStoreDisabled $true

Note: You might need to wait up to one hour (might take longer sometimes), after the changes are applied and before you migrate.

Lets look at the destination mailbox after the migration, when logging is disabled:

Audit8

Above you’ll see that 4 calendar items got migrated but no Calendar logging was done.

Now how do you revert back the changes?

Set-Mailbox Peter.Smith -CalendarVersionStoreDisabled $false

Just set the value back to false. It’s very important to understand that those logging features should be enabled, so make sure you revert the changes done during migration.

The Calendar Logging done during migration is, just like for audits, even more problematic if you are migrating from recoverable items to recoverable items.

Bottom line

In this blog post we discussed how Auditing and Calendar logging in Exchange, might have an impact in your mailbox migration. It’s important to understand that those features are super important and should ideally be enabled, but consider the following:

  • do you really want to log 150 changes to calendar items in John’s mailbox when they were all done by a migration account in the context of a migration?
  • and how will that impact future log searches as part of a compliance process?
  • how about the 50000 audits of mailbox items being moved? do you need those, them being done in the context of a migration?
  • finally, if you’re migrating the recoverable items folder, you’re technically duplicating every audit log that exists in the source, because MigrationWiz will move the audit log entry and create a new one as part of auditing the move

The main reason for this blog post is to prepare you for some potential delays, if you are migrating large item counts with auditing enabled, but also to explain how you can disable it and, in my opinion, have a cleaner destination without a lot of logging that might not be as relevant.

Ultimately, it’s your decision to use this information as you see more fit for your organization.


Are you considering Exchange 2019 as a “hybrid” management server in Exchange Online environments with objects synced from on premises Active Directory?

If you happen to manage an Exchange Online environment where most or all users (and other objects) are synced from your local Active Directory, you know that, for your management tasks to be executed in a supported and easy way, you need two things:

  • The local Active Directory Schema extended to the latest (recommended) Exchange version
  • At least one Exchange management server, to execute the management actions from

Because you need the schema extended, to match the cloud Exchange attributes, in your management server, it’s also logic that you would try and keep your management server with the latest version possible. With that said, you should plan to update your Exchange server on premises, whenever a new version is made available.

Seems simple, right? Well it was that simple, until Exchange 2019 came out and Microsoft decided to not provide Exchange Server Hybrid keys for it.

In the past, Microsoft had a specific site where you would get the Hybrid keys from. In theory, to be compliant, for any Exchange on premises version that was used for management and/or hybrid purposes only, and that did not host any mailbox, you would be able to license it for free.

But in July 2018 in the tech community article “Hybrid Configuration Wizard and licensing of your on-premises server used for hybrid” Microsoft explains how you can now use the Hybrid Wizard to license your Exchange server for free, but also states “Please note that HCW does not provide a ‘hybrid key’ for Exchange Server 2019. If you need a hybrid key, the latest version that it is available for is Exchange Server 2016.”

I know this is not new, but managing synced organizations has been and will continue to be a hot topic, for many different reasons, so I decided to blog about it, again.

Why not extend the free licensing to Exchange 2019?

It’s public that Microsoft still has a strong focus on providing Exchange 2019 as the Exchange version for organizations that do not want to move to the cloud, and this licensing decision is for sure related to that, in my opinion.

Is the Hybrid Wizard the best option to license your server?

I think that the Microsoft move from the website to the Wizard, to obtain licenses for hybrid server versions until 2016, is a clever one because it allows the licensing process to be easier to control, however, not all Exchange on premises in this environments can be truly characterized as “Hybrid”.

Many organizations either never had Exchange on premises or don’t rely on any type of interaction with their on premises Exchange, that could truly define it as a “Hybrid server”. Mail flow is fully in the cloud, all hardware and applications on premises interact directly with Exchange Online and free/busy between the cloud and on premises is not required because no objects are hosted from on premises.

So now you not only ask those type of customers to install an Exchange Server, just so they can manage their synced objects in a supported way, but you also ask them to run the Hybrid Wizard in a technically “non-hybrid” environment.

What’s my best option to keep my management server up to date?

The answer is simple: To stay fully up to date, you should update to 2019 and pay for a Standard license.

But if you don’t want to do that, at least for now managing the objects with Exchange 2016 is also a very valid option. Keep the 2016 version for as long as it’s officially supported and tackle the upgrade when you really need to have it done to stay in that supported scenario.

A mix of PowerShell and Graph API to create a Microsoft Teams test environment and test the BitTitan MigrationWiz Teams migration tool

For those of us that work a lot with cloud data migration projects, one of the challenges that at least I end up having is to create random data to migrate, that being to test a new migration workload or endpoint, to do a proof of concept or even to troubleshoot a specific issue.

This blog post is focused specifically in adding data to Microsoft Teams, so if for any reason, stated above or not, you need to populate your Microsoft Teams environment, keep reading.

And of course if you’re considering to migrate Microsoft Teams you should go to the BitTitan website and read more about it. We (have an awesome tool that you should definitely use to migrate Teams and if you reach out to me I can get you some help testing it, after you create your test environment with the help of this blog post!

What we will provide in this blog post is a script, authored by Ash Karczag and co-authored by me, that will leverage both PowerShell and the Graph API (yep that’s how awesome the script is), to create and populate a bunch of stuff in your Teams environment, in your Office 365 test tenant.

Note: This script wasn’t designed to be executed in production tenants, since all it creates is based on random names (i.e Team names, Channel names, etc) and it doesn’t have error handling or logging.

What will the script create?

The following actions will be executed by the script, to create objects in Office 365:

  • Create 2 users
  • Create 10 Teams
  • Create 5 team public channels, per Team
  • Publish 5 conversations in each channel of each Team
  • Upload 5 files to the SharePoint document library of each Team

Which SDK modules or API’s do you need to configure?

The script will leverage multiple SDK’s, for multiple different reasons that include read or create objects and the Microsoft Teams Graph API will be used to create the conversations and upload the files. So in summary, you need:

  • Microsoft Azure MSOL Module to connect to your Office 365 tenant (if you don’t have it installed, run “Install-Module MSOnline”)
  • Microsoft Teams PowerShell (if you don’t have it installed, run “Install-Module -name MicrosoftTeams”)
  • Microsoft Teams Graph API (instructions below on how to set it up in your tenant)

How to configure the Microsoft Teams Graph API authentication

The script requires Migration Teams Graph API access, which is done via OAuth2 authentication. The Graph API will be used to create conversations and to upload the files.

To configure the authentication, follow the steps below:

  1. Go to portal.azure.com, sign in with global admin
  2. Select Azure Active Directory
  3. Select App Registrations
  4. Select + New Registration
  5. Enter a name for the application, for example “Microsoft Graph Native App”
  6. Select “accounts in this organizational directory only”
  7. Under Redirect URI, select the drop down and choose “Public client/native” and enter “https://redirecturi.com/&#8221;
  8. Select “Register”
  9. Make a note of your Application (client) ID, and your Directory (tenant) ID
  10. Under Manage, select “API Permissions”
  11. Click + Add Permission
  12. In the Request API Permissions blade, select “Microsoft Graph”
  13. Select “Delegated Permissions”
  14. Type “Group” in the Search
  15. Under the “Group” drop down, select “Group.ReadWrite.All”
  16. Select “Add Permissions”
  17. You will get a warning message that says “Permissions have changed, please wait a few minutes and then grant admin consent. Users and/or admins will have to consent even if they have already done so previously.”
  18. Click “Grant admin consent for <tenant>”
  19. Wait for permissions to finish propagating, you’ll see a green check-mark if it was successful
  20. Under Manage, select Certificates & Secrets
  21. Select “+ New client secret”
  22. Give the secret a name that indicates its purpose (ex. PowerShell automation secret)
  23. Under Expires, select Never
  24. Copy the secret value. YOU WILL NOT SEE THIS SECRET AGAIN AFTER THIS
  25. Now you have the Client ID, Tenant ID, and Secret to authenticate to Graph using PowerShell

Once the authentication is configured and you have your secret key, you can proceed to executing the script.

How do I get the script

The script is published in Ash’s GitHub, and it’s called Populate_Teams_Data.ps1. Copy the content into a notepad or any script editor in your machine and save it in the same ps1 format.

How to execute the script

So now lets go over the steps to execute the script. I am going to number them, just so it’s easier for you to follow:

  • Open PowerShell – It is recommended that you open it as an Administrator, since the script will try and set the execution policy to RemoteSigned

TeamsScript2

  • Browse to the .ps1 file location and execute the following
.\Populate_Teams_Data.ps1 -AdminUser "<AdminUsername>" -AdminPass "<AdminPass>" -License "<LicenseSkuID>" -tenantId "<DirectoryID>" -clientId "<AppID>" -ClientSecret "<ClientSecret>"

The values above should be the following values:

    • Admin User – your Office 365 Global admin
    • Admin Pass – the password for the GA
    • License – the license AccountSkuId that you want to apply to the newly created users (Note: Connect to the MSOnline module and run the Get-MsolAccountSku cmdlet in case you don’t know what the value is)
    • TenantId – value that you obtained in step 9 of the section above (Directory)
    • ClientId – value that you obtained in step 9 of the section above (Application)
    • Secret – value that you obtained in step 24 of the section above

Script Output

The script will describe you the steps that is taking, during its execution, such as:

  • Creating the users and the teams

TeamScript4

  • Adding users to Teams

TeamScript5

  • Creating channels per team

TeamScript6

  • Creating usable data in your teams

TeamScript7

Additional notes about the script

The following should be considered when executing the script:

  • This script was designed and created to be ran against empty tenants. It’s ok if you have users or are using other workloads, but do not run this in a production tenant, since the script was not designed for that.
  • The script can be executed multiple times, although it was created for single execution. It will check if Teams and Channels need to be created, but it will try and create users always, unless the user already exists. Have that in mind if you choose to run the script multiple times, to create more usable data.
  • The script only creates small files in the Teams. If you want to do a migration test with a large volume of files, you’ll have to upload them manually.
  • The script leverages the Graph API, which is the optimal way to create messages and upload files into the Teams, but it’s also a Beta API, so sometimes you might see random timeouts.

We welcome all feedback you might have. Enjoy!


Exchange room booking and recurring meetings was finally simplified

If you follow the Microsoft Exchange Team blog, you probably noticed this post from around 1 month ago, “Easier Room Booking in Outlook on the Web”.

I know it’s been a month, but I haven’t blogged my 2 cents around this, so here it goes.

Why this change

This was an old ask from the Community, so well done for the Exchange Team (and in this case more specifically the Calendar Team) for making this happen.

Selecting a room

The initial focus is on user experience as it relates to room filtering. You can use filters like room location (allows multiple locations), room availability and room features (Audio, Video, etc).

Recurring meetings and room availability

This is one of the major changes implemented. Although Exchange has mechanisms to allow you to coordinate the availability of all meeting attendees, the availability of meeting rooms for the entire series was always a challenge.

The Exchange Team is addressing the above by having Exchange perform an availability query for all meeting dates, until it finds one unavailable, and let you know for how many instances the room is available.

Multiple rooms

In my opinion this is the second major change. For Geo diverse teams, with attendees in multiple office locations, you can select “browse more rooms” and add a local room for each of the attendees locations.

How does an Admin implement this

Basically by leveraging the Set-Place cmdlet (only available in Exchange Online), to define the room characteristics.

Bottom line

I really like this new feature. If I had to point out some negatives, those would be the fact that it’s not support for Exchange on premises, it was launched as an Outlook Web Access feature only (for now – it’s in the road map to make it available for Outlook) and also, in my opinion, the Exchange Team should look at allowing the Organizer to select an additional room(s) when the one selected does not cover all instances.

Finally just want to point out the -GeoCoordinates parameter in the Set-Place cmdlet. It’s really cool and allows you to enter the coordinates of the room and integrate with Bing Maps!