Are you planning to move your e-mail system from Google Apps to Office 365? Do you have a large number of users, and therefore migrate the users in stages, and therefore set up mail flow coexistence between the two systems? Keep reading.
On this blog post I am going to guide you through the process of setting up mail flow coexistence, between Google Apps and Office 365.
There are several ways to achieve the mail flow coexistence, from an Office 365 perspective, such as:
- The Internal relay domain with mail users method
- The Criteria Based Routing method
This blog article will guide you through the mail flow coexistence configuration, using the internal relay domain method. This method as some pros and cons when compared to others, such as:
Pros:
- Easy to configure
- If the processes are well defined it’s also easy to manage as the migration goes along
Cons:
- Requires more processes during the migration stage
- Requires more changes post migration
- When not using Dirsync or AADsync the users on Office 365 need to be created via the Exchange Admin Centre or the Exchange Online PowerShell, which makes the user creation process more complicated.
- When you enable a mailbox on Office 365, for a user being migrated, all new e-mails coming from other Office 365 users (and external users if you already changed the MX record to Office 365), will not reach the Google Apps mailbox and stay only on the Office 365 mailbox. This makes that the process of migrating the user data has to be managed in batches of users, and done ideally over the weekend.
In my opinion, if you’re using Dirsync this method is an option you should consider.
Now let’s get what matters: the steps for configuring mail flow coexistence between Google Apps and Office 365.
Step 1 – Validate your domain on Office 365:
Of course if you are moving to Office 365, the first thing you need to make sure is that your domain is validated there, and enabled for Exchange Online.
On my scenario, the domain that I am using is myexchlab.com

I am not going to give you a step by step guide on the simple tasks, such as adding and validating the domain on Office 365, to keep this blog post focused on the essential, which is to set up the mail flow coexistence.
As you can see above you need to make sure that your domain is added and validated, and that the domain purpose is set to ExchangeOnline.
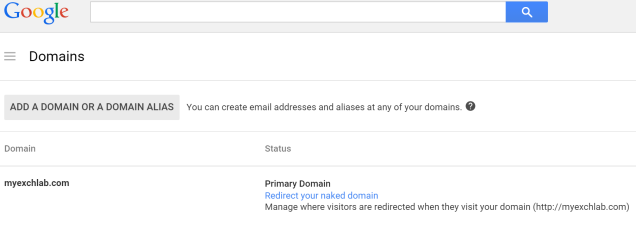
As you can also see above, on my Google Admin Portal, my domain is also validated and working there, as that is my current production environment.
Step 2 – Create and enable your Office 365 users as mail users
Depending on the way you create the users, they can already be mail users on Office 365, i.e. if you are using Dirsync or AADSync to push your users to Office 365, you should have them as mail users on premises, which will also make them mail users on Office 365.
To sum up, there are two ways to create all your users as mail users on Office 365:
- If you’re using Dirsync enable them as mail users on premises and push them to Office 365
- If you’re not using Dirsync you need to create all your users via the Exchange Online PowerShell, or the Exchange Admin Centre, directly as mail users. The reason is simple: In Office 365, it’s not supported to enable a user without Exchange attributes (just a regular MSOL user) as a mail user. The only way to give him Exchange attributes is to enable an Exchange Online license and create him a mailbox.
In my case I am not using Dirsync, so I am going to show you how to create all my users as mail users. To do so you can use a script (let me know if you need one), or do it manually via the Exchange Online management Shell.
Connect to the Exchange Online Powershell, and run the following cmdlet:
New-MailUser -Name “GApps1” -Alias Gapps1 -ExternalEmailAddress Gapps1@myexchlab.com -FirstName GApps1 -LastName 1 -MicrosoftOnlineServicesID GApps1@myexchlab.com -Password (ConvertTo-SecureString -String ‘P@ssw0rd’ -AsPlainText -Force)

Repeat the step for each user you want to create.

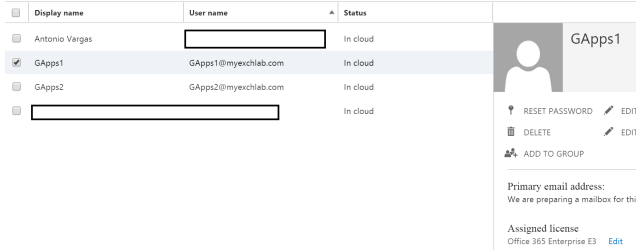
Now I have GApps1 and GApps2 created on Office 365, both users also exist and have their productions mailboxes on Google Apps.

The users are also Exchange mail users, which is fundamental to have both an up to date Global Address list on Office 365, and to make the mail flow coexistence work.
I know that this way of creating the users might seem a bit manual, but there are two things you need to consider:
- Most of you will be using Dirsync, which makes the user creation process much simpler.
- You can script the user creation via the new-mailuser cmdlet and make your live easier.
Step 3 – Configure the routing domain in Office 365
In order to have mail flow coexistence between Google Apps and Office 365, you need to set up a forwarding address in each Google Apps user you move to Office 365. In order for it to work, the forwarding address needs to be from a sub domain of your main email domain. In my case I will use onprem.myexchlab.com which is a subdomain of myexchlab.com.
To properly configure the subdomain you need to:
- Validate it on Office 365 and configure it for Exchange Online
- Create an MX record for that subdomain, that points to office 365
- Make sure that the users have a secondary SMTP address for that subdomain, that you will use as forwarding address on google
To validate the routing domain, go to the domains section on your Office 365 portal and click to add a domain.
As the domain is a subdomain of your main e-mail domain, the validation should be instant.
Skip the steps to add users, and make sure that you choose Exchange as domain purpose, as sown below.

The Office 365 wizard will give you an option to add the DNS records (depending on your domain name provider), or you can just copy and paste the DNS records and add them yourself. The only relevant record that needs to be created, is the MX record.

Make sure you verify that the MX record is created.

Step 4 – Configure Exchange Online for mail flow coexistence
On the Exchange Admin Centre of your Office 365 tenant, you need to do two things:
- Configure your main domain as internal relay
- Create a send connector to send e-mail to your Google Apps
To configure your domain as internal relay, log in to your Office 365 tenant, and on the bottom left click on “Admin > Exchange”.
On the Exchange Admin Centre go to “Mail Flow” and click on the “Accepted Domains” tab.
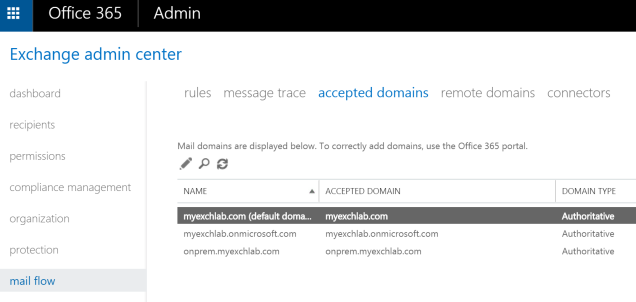
Select your main e-mail domain, in my case myexchlab.com, and click edit.

Select “Internal Relay” and click save.
Now let’s create the send connector. On the Exchange Admin Centre, select “Mail Flow” and click on the “Connectors” tab.
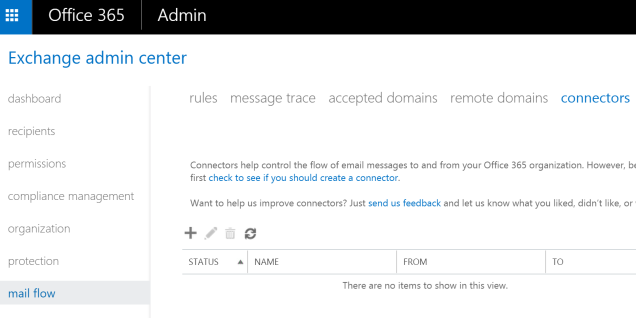
Click on the “+” to add a new connector.

When creating the new connector, select from Office 365 and to your organization’s email server.

Select a name and keep the existing options selected.

Select “Only when email messages are sent to these domains” and click on “+” to add your main email domain.
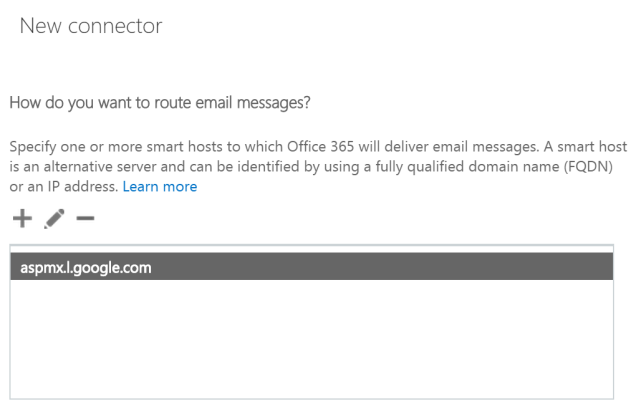
Enter one (or several) of the available Google Apps MX record as a smarthost.

You can check the Google Apps MX records by doing an nslookup to your domain.

Untick the always use TLS option and click next twice.

Finally enter a valid e-mail address from your Google Apps environment, and click validate. Make sure the test succeeds.
Migration steps
Now that you have Office 365 configured for mail flow coexistence, let me give you a quick overview on the migration steps:
Define a migration batch
The first thing you need to do is define a group of users to be migrated. Because there’s no sharing of resources cross platforms (i.e calendars), I highly recommend you approach your migration batches on a per department basis. You might want to export all e-mail addresses of the users being migrated, into a CSV file, in order to use that file to script all the forthcoming tasks.
Activate the user licenses in Office 365
Once you have your group of users defined, you need to activate an Exchange Online license for them on Office 365. Like stated previously you can script that, but for the purposes of this blog post I will just activate the license manually, as the main goal here is to explain how to set up the mail flow coexistence.
Go to your Office 365 admin portal, click on “Users > Active Users”, select the user you want to license and add an Exchange Online license.

Via the Exchange Admin Centre you will be able to see that, the user is no longer a mail user, and it’s now a mailbox.
Note: As stated before, all e-mail coming from other Office 365 users, or external e-mail if you changed the MX record of your main domain to point to Office 365, will now stay on the GApps1 Office 365 mailbox and not on his Google Apps mailbox.
Migrate your user’s data
Now it’s time to push all the data from Google Apps to the newly created Office 365 mailbox. And how can you do that? Well the answer is simple: Use the best tool in the market. MigrationWiz from BitTitan.
https://www.bittitan.com/products/migrationwiz/about

MigrationWiz will move all your emails, calendars and contacts, from Google Apps to Office 365. In addition you can also move your Google Drive and your Google Vault data, with other types of migrations supported by the same tool.
Set up the forwarding address on Google Apps
Now at the same time you start to move the data, you need to set up a forwarding address on the Google Apps accounts you’re migrating. I’ll be blogging soon an explanation on how MigrationWiz automatically sets that up for you, but for now I will again do it manually on my GApps1 user.
Log in to https://admin.google.com
Go to Users and click on the user you want to set up the forwarding. Click on “Account”.

On the Email routing section add the forwarding address. Untick the “Change SMTP envelope”, the “Google Apps email” (leave a copy on the source) and the “Inherit routes from <your domain>”.
Important note: do not leave a copy on the source mailbox, or else when moving the data to Office 365 via MigrationWiz, you might get duplicates.

Another thing that you need to make sure is that all the users being migrated have a @onprem.myexchlab.com secondary SMTP address.
Connect the users to Office 365
Once all the data is migrated all you have to do is set up your users to connect to Office 365 and start working there.
BitTitan also has a tool to help you automate that process: DeploymentPro
https://www.bittitan.com/products/deploymentpro/about
DeploymentPro will configure Outlook for all your users, and bring all attached PST files and signatures from the old profile (if applicable).
Test mail flow
Now that we’ve covered all the migration steps, it’s time to test mail flow between:
- GApps1 that was migrated to Office 365
- GApps2 still in Google Apps
Test message from the Internet to GApps1 (Office 365)
With the MX record still pointing to Google Apps, we will send a test message from the Internet to GApps1, that was already moved to Office 365.
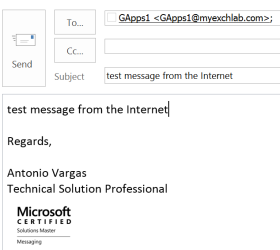

As you can see the message got delivered to Office 365.
Test message from GApps2 (Google Apps) to GApps1 (Office 365)
Now let’s send a message from a Google Apps user to an Office 365 user.


And again message delivered to GApps1 Office 365 mailbox.
Test message from GApps1 (Office 365) to GApps2 (Goggle Apps)
Now the most relevant test, the one this blog post is all about: mail flow between Office 365 and Google Apps.
Let’s reply to the GApps2 email.


And there you go. Working!
Internet mail flow considerations
On this coexistence scenario, there is no centralized outbound mail flow, which in essence means that Office 365 users will email directly to the Internet, and the same of course will happen to Goggle Apps users. Having said that, you need to make sure that your SPF record is up to date, and reflects that scenario. For help setting up your SPF record, go to the Microsoft SPF record wizard page.
Summary
Most of the configurations described above only need to be done once, but on the migration steps section you will want to automate everything. I’ve seen a lot of companies concerned with things like setting up the forwarding address on Google Apps, or scripting the way you enable licenses for users. One of my next blog post will be how MigrationWiz automates the forwarding address configuration, and you can ping me if you need more information about that, or if you need scripts for things like enabling the licenses on Office 365.
As stated on the beginning of this post, there are other methods to configure mail flow coexistence between Google Apps and Office 365, and I will soon be blogging about them so stay tuned.


